<iframe width="560" height="315" src="https://www.youtube.com/embed/FoszALlFgP8" title="YouTube video player" frameborder="0" allow="accelerometer; autoplay; clipboard-write; encrypted-media; gyroscope; picture-in-picture" allowfullscreen></iframe> |
|
|
|
Create Map
After logging in, you can create a new map by clicking the "Create map" button.

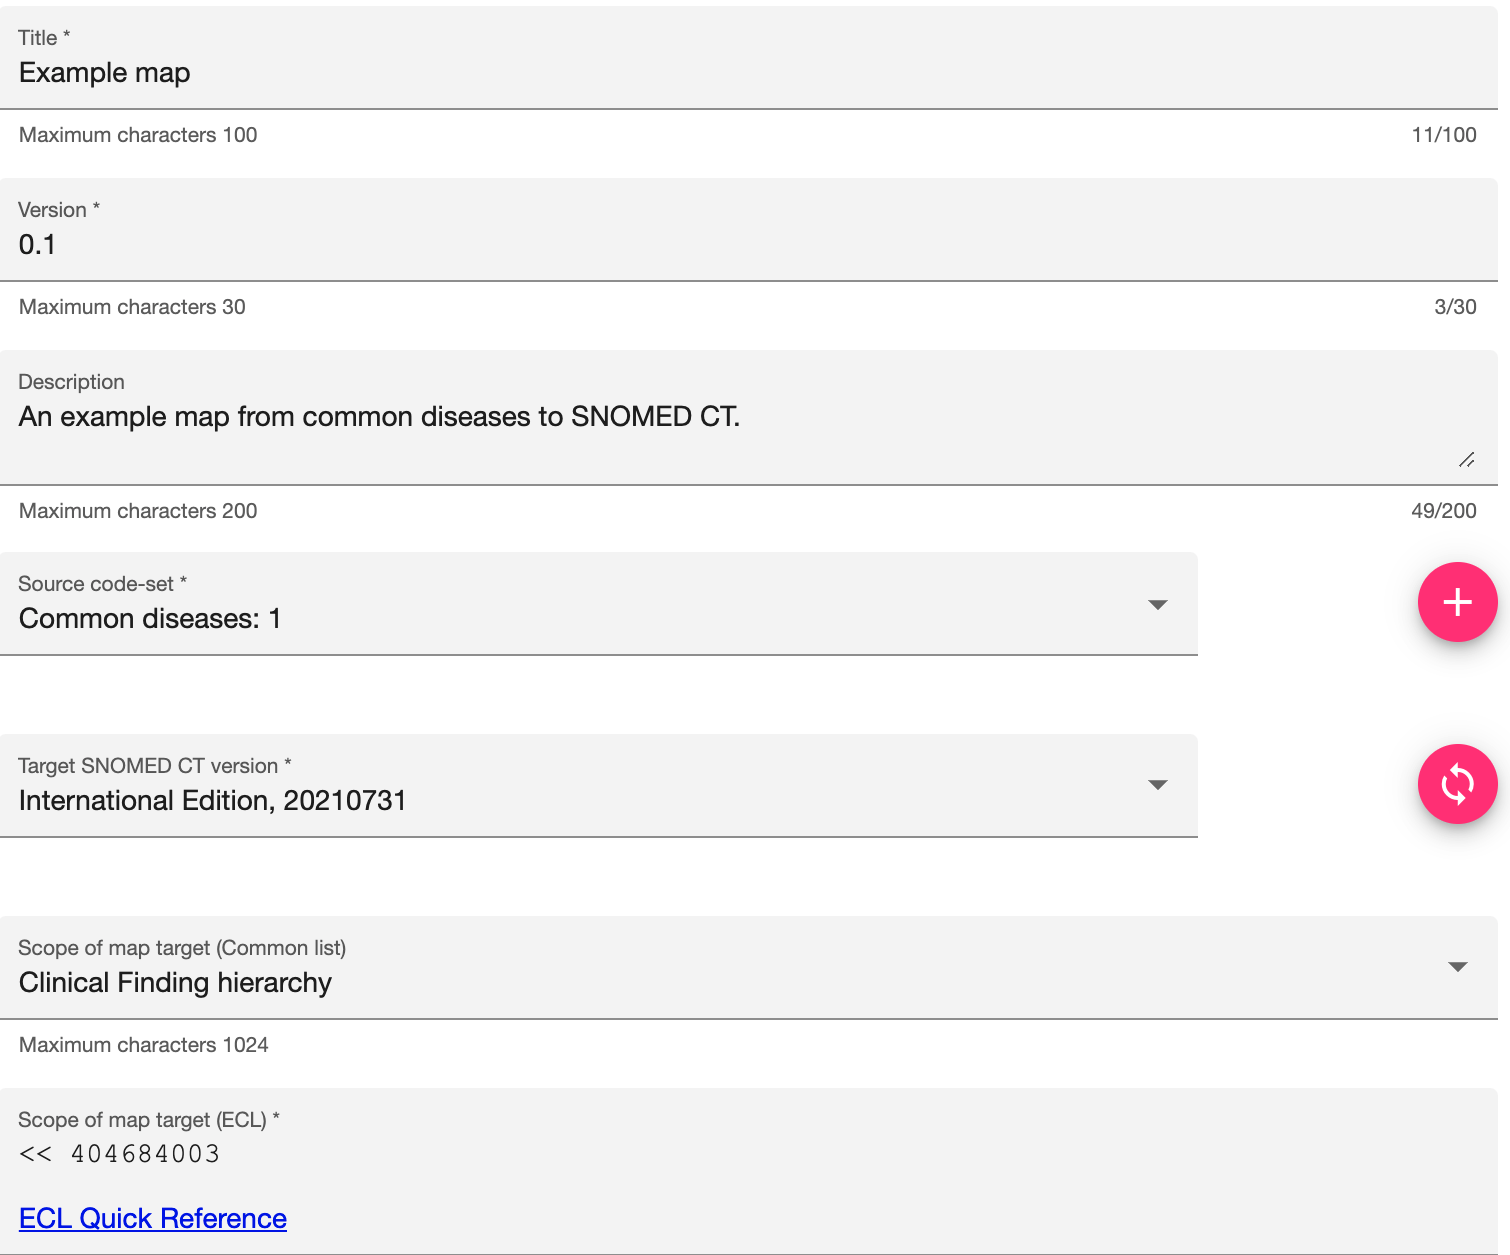
This will open a dialogue to allow you to define and upload the metadata for the map (e.g. title, version, source, target, etc)
Select Author Mode
First, you need to state the author mode for your project. This can't easily be changed once the map is created.
When creating a new map, choose the author mode that best fits your workflow:
- Single Author Mode: In this mode, one person is responsible for mapping, and a separate reviewer will review and validate the mapping.
- Dual Author Mode: Two mappers work independently (blindly) on the mapping process. If they select different targets, a reconciler will review and resolve any discrepancies.

Specify Map Metadata
Next, you need to define the key metadata for your map:
- Title: Provide a descriptive name for the map (e.g., Example Map).
- Version: Assign a version number to track changes (e.g., 0.1).
- Description: Briefly explain the purpose of the map (e.g., An example map from common diseases to SNOMED CT).
- Source Code-Set: Upload the source code set to Snap2SNOMED and select the relevant dataset (e.g., Common diseases: 1).
- Target SNOMED CT Version: Choose the SNOMED CT version you are mapping to (e.g., International Edition, 20210731).
- Scope of Map Target: Define the scope of the SNOMED CT target concepts:
- Select from a predefined set (e.g., Clinical Finding hierarchy).
- Use a custom Expression Constraint Language (ECL) query for a more specific scope (e.g., << 404684003).

Once you have filled in all mandatory (*) fields, click the "Save" button to create your new map.
Select Individuals and Specify Roles
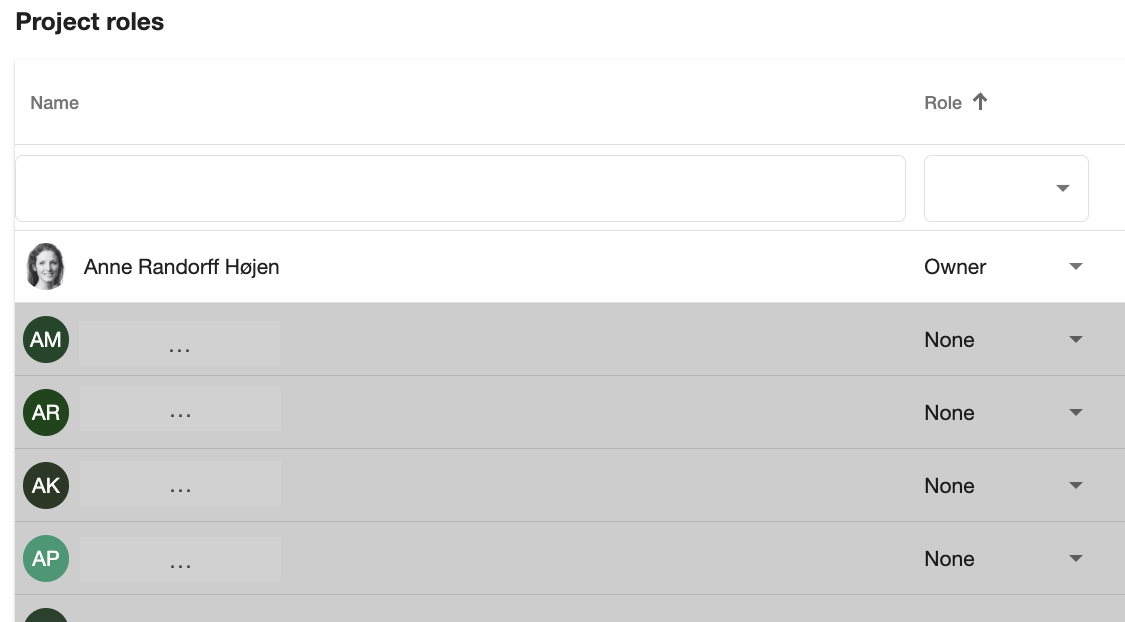
In this step, assign roles to team members based on their responsibilities in the project:
- Owner: Has full control over the project, including managing roles, creating new versions, and handling project settings.
- Member: Can author mappings, review and reconcile differences, and create tasks.
- Viewer: Has read-only access and can view the project but cannot make changes.
How to Assign Roles:
- Search for an individual in the list.
- Select their role from the dropdown menu.
Proper role assignment ensures clear responsibilities and effective collaboration within the projec

Save Map
Once you have filled in all mandatory (*) fields, click the "Save" button to create your new map.


